Showing posts with label pattern. Show all posts

Thursday, 18 September 2014

Conscious Design when Crafting

Here's the problem I have encountered. I love to craft, I love sewing and making things. BUT, my taste does not lend itself to filling my house with loads of fabrics and I don't like a look that is 'homemade'. So how does a person indulge their love of crafting while still making things that will fit into a contemporary aesthetic?
Some things to consider:
- Choose a base color and/or fabric that will add cohesion. For me it was natural colored linen. It is beautifully neutral and I have not found a color that doesn't work well with it. The linen looks clean and minimalist and blends well. Consider some other fabrics: ecru muslin, indigo dyed cotton, white cotton, burlap. When you have chosen, stick to that choice.

While the maple leaf blocks in this quilt are made from quite old-fashioned floral designs, the white cotton gives it a contemporary twist. This quilt could be put in many a modern home and it wouldn't fight with the established decor.

- Complement the base color and/or fabric with carefully added patterns and colors. Not only does this result in a less loud and homemade look, it is very economical. You don't have to go crazy buying yards of gorgeous prints. A fat quarter will go a long way. In fact scour thrift stores for cool fabrics that you can use from old clothes, then use it sparingly to add emphasis.

With these book covers, I added just a few squares of patterned fabric for emphasis. These fabrics came from all over the place, one is an old bed sheet.
- Don't be afraid of blank space. This is common advice in graphic design. You don't have to fill every blank piece of fabric with applique, embroidery and patchwork designs. Sometimes a trim of squares in patterned fabric is all you need or a button or two. Less is more because it doesn't get lost in an assault of busy-ness.
The white background really enhances the origami crane.

- Play with texture. Using different textures is very fashionable right now and is a fun way to incorporate different crafting techniques. Pair chunk knit with a cotton panel in a pillow. Mix different fabrics, but remember go easy.
The two materials here are burlap and cotton. There is no intricate design, the interest comes from the contrasting textures.

- Stick with basic designs if you want to play with colors, sewing techniques etc. Tote bag designs are everywhere these days. They're popular because the designs are simple and therefore easy to execute, but the simplicity gives you a blank canvas on which to experiment with patterns or embellishments. I see a lot of patchwork blocks that are beautifully intricate but I don't enjoy the look because so many different patterns and colors have been used. The more intricate the project the more conscious you need to be of not going crazy with materials.
This messenger back was extremely easy to do and a very simple design which meant I could be bold with fabric. Both fabrics are from old bed sheets.

Thursday, 7 February 2013

TV Project 1: Kimono Coasters

Kimono silk is just something I can't resist, it's sexy makes me think of geisha.  It's also awkward to work with, since it is so sheer and thin.  I like to always have a project on the go that I can do while watching TV. So this is my TV project du jour.   

NOTE: The instructions for the rosettes can also be used to make the ones you saw on the boudoir pillow.  Imagine a pillow with kimono silks! Ooh la la, get your Valentine's horny on!

Level: Beginner
Time: 2 hours per coaster
Cost: $2 (approximately
Materials and Tools:
Hexagon template, size: 1 inch per side
Kimono silk scraps (or scraps of cotton quilt weight fabric) in three different patterns in similar colors.
1/2 yard of grey felt
Thread in contrasting color and matching color
Pins
Scrap paper
Needle
Iron
Scissors for fabric
Scissors for paper

- First cut seven hexagons out of scrap paper
- You are going to need one hexagon from one patterned fabric then three each from two additional patterns
- Place your paper hexagon onto the wrong side of your chosen fabric and pin in place
- Cut around the hexagon with a quarter inch seam allowance
- Fold the fabric seam over the paper and tack all the way round with the contrasting thread
- Remove pin
- Do this with all seven hexagons
- The one hexagon cut from a different fabric to the other six is the center of the rosette
- Take this hexagon and a hexagon of another pattern place them with right sides facing each other and sew the seams together with whip stitch
- Continue doing this until you have all six hexagons of alternating pattern sewn to the center one
- Iron your rosette so the seams are nice and sharp
- Remove the paper from the center hexagon and pin to the felt
- Cut out the felt so that the rosette is pinned to smaller piece of felt with some excess fabric around it.
- Remover one paper from an outer hexagon and pin to the fabric with the seam folded under
- Sew the edge with a running stitch
- Do this hexagon by hexagon until all edges are sewn to the felt
- Trim off the excess felt
- Press with iron
- DONE

Tuesday, 12 July 2011

The Easiest Dress - Ever!


I am really a dressmaking novice so I wanted to make the simplest dress that would require no zips (my achilles heel) and no darts (haven't learned how to do them yet). I am also lax at measuring so this is a one size fits all. I gave it shape with a belt made from the same fabric. Without the belt it kind of looks like a night dress and I could easily make one with appropriate fabric. I didn't really have a pattern I just made a basic dress outline that I used for the front and back. My sister-in-law and mother-in-law both asked me where I bought it, which is a very good litmus test of how successful it is. The worst thing is if a dress looks 'homemade', this is where your careful seaming and trimming of threads becomes crucial.

Wednesday, 17 February 2010

My Pennant Quilt Progress


I am still squirreling away on my paper pieced quilt and about half done with the top. Superbowl weekend I laid my first lot of strips out and found one doesn’t quite match in size which is a little irritating and also mystifying, but I am sure I will come up with a way make it work. I have made a new template to add straight edges to each end of the pennant style triangles so that I have a straight rectangular quilt to work with when the strips are sewn together.

Tuesday, 26 January 2010

Salaula Treasures


Yesterday I went to the giant salaula market here in Lusaka. Salaula is second hand clothes and this market had EVERYTHING, as another friend said, it’s like a department store, the market is organised into sections – skirts, children’s clothers, shoes, menswear etc. I saw some really great stuff and bought these wonderful bed sheets which I will use for quilting. Aren’t they funky?

Thursday, 21 January 2010

Paper Piecing How To


I know a few months ago I gave a few pointers on paper piecing but I don’t think there is any harm in going over them again.
I generally use paper piecing for basic repetitive patterns but they can also be used for patchwork blocks. In particular if you have a block you want to copy but you don’t have the measurements, method etc. Paper piecing makes this easy because you don’t need to work out seam allowances.

You will need:
Cardboard for your template/s (for example old cereal boxes)
Scrap paper (magazines or newspapers work well)
Scissors
Tape
A thick pen
Needle and thread
pins
Scraps of fabric

First make your template:
The triangle I am using I made by using a rectangle of cardboard, placing it lengthways, find the middle then drawing to lines from the bottom two corners on the shortest sides to the opposite side dead centre.

If you are making a number of templates for a block, number them and then number the block you have to make it easier to work out how to place them.

Tape the edges of your template so that when you draw around it, you don’t soften the edges. Alternatively you could use template plastic, which is available at quilt stores – or use plastic from packaging. I am trying to use as much recycled materials as I can, plus I don’t have a quilting store here!

Next, use your scrap paper to make the paper pieces by drawing around your template with the thick pen and cut out. Make a stack so you don’t have to keep going back to make more.

Pin the paper pieces to the wrong side of your fabric, leaving about ¼ inch space. Cut out the piece a ¼ inch away from the edge of the piece – very important, do not cut flush with the piece!

Fold the excess fabric over your paper and sew with a large tacking stitch to the paper.

When you have enough for all the stages or patterns you want, you can start assembling.

Place the fabric covered pieces right side to right side with the edges lines up and sew together with a small slip stitch. Check carefully that you have your pieces lined up correctly.

Keep going until you have your quilt. Easy!

Wednesday, 20 January 2010

New Adventures in Paper Piecing


I was feeling kind of down recently. It’s hot here at the moment and after Christmas I felt quite homesick, seeing all that snow and knowing my family is so far away. Nothing improves my mood than working on a craft project, especially sewing, I find it very therapeutic. So I decided to start a new quilt and luckily I have tons of new fabrics to work with (some of you regulars will have read about my love of chitenge material). As I sorted through my fabric stash and bathed in all the colours and shapes, I immediately started to feel better. I chose paper piecing again because I wanted to hand stitch my quilt and I find the slip stitch used in paper piecing super-strong. I also love the whole process of paper piecing and love the feeling of keeping alive this old method.

Considering how important precision is in quilting it’s a bit ironic that I am not a very thorough person, for example I never washed my fabrics when quilting back in the UK. Modern methods of dying mean you don’t really need to pre-wash fabrics, but the chitenge material here often runs, so I did wash them this time. Look how lovely they are with the sun shining through them on the line and the wind blowing them.

The design I am using is very simple, an acute triangle repeated alternately in cream fabric and the various patterns. I think this design will look really elegant and the cream fabric sets off the patterns well. This is a very good method if you want to use up scraps. Watch out for my method of paper piecing for you to follow coming up in the next few days.

Friday, 30 October 2009

Intelligent Patterning


With so many amazing different patterns and colours of chitenge it is very tempting to go crazy and use as many as possible in a new place like ours. We have so many windows that need curtains and opportunities for upholstering. We have been very careful though, because we don't want an over the top colour scheme. Here we put together the 3 fabrics we are sticking to for the décor of the living space. We think they match nicely and are not too over the top – the yellow print is bright and funky with the 60s style flowers, but it is complimented nicely by the pale aquamarine and gold one. We fell in love with the retro pattern on the black chitenge but have had to use it very carefully – our floors and furniture is quite dark and the print could have looked quite heavy. Instead, I cut the pattern out and used it on ecru curtain fabric so that the design is showcased and not lost against the dark wood of the floor. We have continued to use the ecru fabric as borders to maintain a uniform design.

Monday, 29 June 2009

New Ways with Patchwork: Clutch Bag Tutorial Part 1

I originally found this design in a book my friend has on patchwork bags, I LOVE fan patchwork and it's the perfect project for my pending nuptials. Months back when we first got engaged, I went mad buying kimono silk with the idea of maybe using them for the wedding. Well here's my chance. The bag is just the right size for lipstick and the like.

I amended the pattern to my own method using paper piecing which I love. It is such a small project that it won't take long and you can use very small amounts of fabric.

You will need:


  • Scraps of fabric (size depends on how big the purse will be)
    Scrap paper for the paper templates
    Batting 2oz for a 24cm long bag

  • Inner fabric as above

  • Thread (sewing and quilting thread)

  • A zip

Here's part 1


First draw a circle as big as you want to clutch to be. Mine was drawn with a compass set to 12 cm.


Cut the circle out. To make the fronds you need to divide the circle into 16 equal segments. Do this by folding the circle eight times, mark the folds with a ruler and pen. Set a compass at 4 cm and draw this smaller circle in the centre of larger circle. Cut the large circle in half. Then cut out the semi-circles and then cut the 16 segments out - picture below.


The semi-circles you don't need but the fronds are for your paper piecing. Pin them to the wrong side of your fabric and cut them out with a 1/4 seam approx (sometimes use more). You will see I used pinking shears, this was to stop the fabric fraying - very common with some silks.

When you have cut out the fabric pieces, use a contrasting thread to tack the sides over the paper in biggish stitches. After, you can remove the pins.

Use the pieces to decide on your combination then take the two first put them right side to rights side, with the paper and fold seaming showing outward and whipstitch together. Continue until you have two semi-circles.


Part 2 will come when I do it myself - either tomorrow or day after!

Friday, 29 May 2009

Honeycomb Garden Throw


Seems a while since I added anything about quilting recently. Here is my completed honeycomb throw. It's not really a quilt as it is backed with fleece rather than with 3 layers, this was to speed up the processs and make it more versatile.

Now up for sale on Etsy! Ok, yes a bit of promotion there - sorry.

Saturday, 23 May 2009

Busy as a bee


The craft fair is just over a week away. I am busy getting as much stuff together as I can and have made a couple of cushion covers today. More of what I have made can be found on my Flickr profile.


More about Phyllis b can be found here:


Saturday, 25 April 2009

The Wedding Quilt


The wedding day came so I can now share with you the quilt I have been secretly working on for the last few months.

The block is maple leaf, mostly hand stitched and completely hand-quilted. The names and date we added by transfer because I didn't have time to embroider them, the flowers are embroidered. The photos were taken in Charleston South Carolina the day before the wedding.


Friday, 27 March 2009

Retail Therapy

Today I bit the bullet and went to the Birmingham Social Networking Cafe. I am not very good at these things, but met a lovely lady and we talked for ages, I should've thanked her for allowing me to latch on and dominate her attention.

After, as I was in the area, I went looking for supplies in the wonderful indoor market. Found a fab haberdashery stall, where I got tons of supplies. Also found a great fabric stall at the outdoor market where I bought some rather lovely floral cotton for 1 pound a metre. I rounded off my trip with a visit to the Fancy Silk Store where I continued to feed my fabric addiction.


When I got home I found the fabric I'd bought off Ebay had arrived!

I put the floral flavour down to Spring and the fact I am reading Proust - pretentious moi?


Tuesday, 17 February 2009

In Praise of Paper Piecing


I decided I needed a change of pace from the quilting, hence the new hexagon project. It's great to be working with such fresh fabrics and I have always loved paper piecing.
Here are some brief instructions on having a go:
  • First, go here to find out how to draw an accurate hexagon

  • Make a template from cardboard or plastic
  • draw lots of hexagons onto old envelopes, magazine pages or whatever and cut them out.

  • Next, pin a paper hexagon to the wrong side of your desired fabric
  • Cut around the hexagon, allowing a 1/4 inch of fabric extra all the way around or at least to fold over the shape
  • Fold the edge of fabric over the paper and tack stitch all the way around
  • When you have a number of these, choose two put them against eachother flat and whip stitch along the edge with tiny stitches

Many quilters don't like paper piecing because it is a little time consuming, but I find it very relaxing. Each to their own.


Saturday, 7 February 2009

Honeycomb/Hexagon Plans

One of the hardest things for me is getting beautiful fabrics and then contemplating cutting them up. I have noticed a rise in simple quilts that are made up of basic square designs with the intention to show off fabrics. I love the simplicity of them. Since my visit to Cotton Patch where I succumbed temptation and bought some bright and kitsch fat quarters, I have been deliberating on the best way to use them. They are so pretty that I don't want them to get lost in a complicated block, but would also like a fun shape.

Enter the honeycomb, the first ever piecing I tried. The retro feel of the hexagon shape I think will fit the fabrics well, and I get another opportunity to use paper piecing. The pictures on the right are designs to help envisage how I want my design to look. They come from:
CindyBlackberg, bean-sprouts.blogspot.com, moonstitches.wordpress.com, craftjuice.com

Wednesday, 4 February 2009

African Fabric Memories


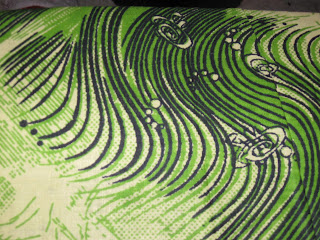
I have mentioned before my love of Zambian chitenges, and I plan to add a few more pictures of women wearing these in the future. A strange coincidence then, to receive a package in the mail from an old friend from Zambia, containing 4 new chitenges. The patterns are above, I love the last one in particular.
It is amazing, the variety of colours and designs that go into designing these vibrant pieces of fabric, from mobile phone and razor blade prints, to op artesque patterns. And I am touched that my friend sent me such a thoughtful gift, all the way from Zambia

Sunday, 1 February 2009

Inspiraton Board - part deux


Here are a couple more inspiration boards of fabrics, projects, colours and patterns that strike me. I love these boards even just as mood enhancers on a cold, wintry day. I also would like to thank whoever it was in the ever expanding world of the internet who turned me on to inspiration boards and how to do them using powerpoint, then saving as a jpeg. I am sure it was someone from the offbeat bride tribe.


Thank you to those out there who provide me with ideas and I have included here.